APNIC
The Asia Pacific Network Information Centre (pronounced A-P-NIC) is one of the five global Regional Internet Registries. APNIC serves the Asia Pacific region comprising of 56 different economies and serves the largest region (by population size).
This is more of a guide than a step-by-step how-to, however, it does contain a fair bit of detail as to how to create your ROAs.
Requirements
To enable Resource Certification and create your ROAs, your MyAPNIC account must have:
- Two-Factor Authentication (2FA) enabled. This is beyond the scope of this guide, however, APNIC do have a section of their website dedicated to Two-Factor Authentication and how to enable it on your MyAPNIC account.
- The appropriate MyAPNIC permissions to manage Resource Certification. By default, Corporate Contacts have Update permissions and other contacts only have View permissions.
Step 1 - Activating the RPKI Engine
In order to certify resources under your account, you need to activate the RPKI Engine within your MyAPNIC account. To do this; login to your MyAPNIC account, and then on the menu bar at the top of the window click on Resource Manager followed by RPKI in the drop-down that appears.
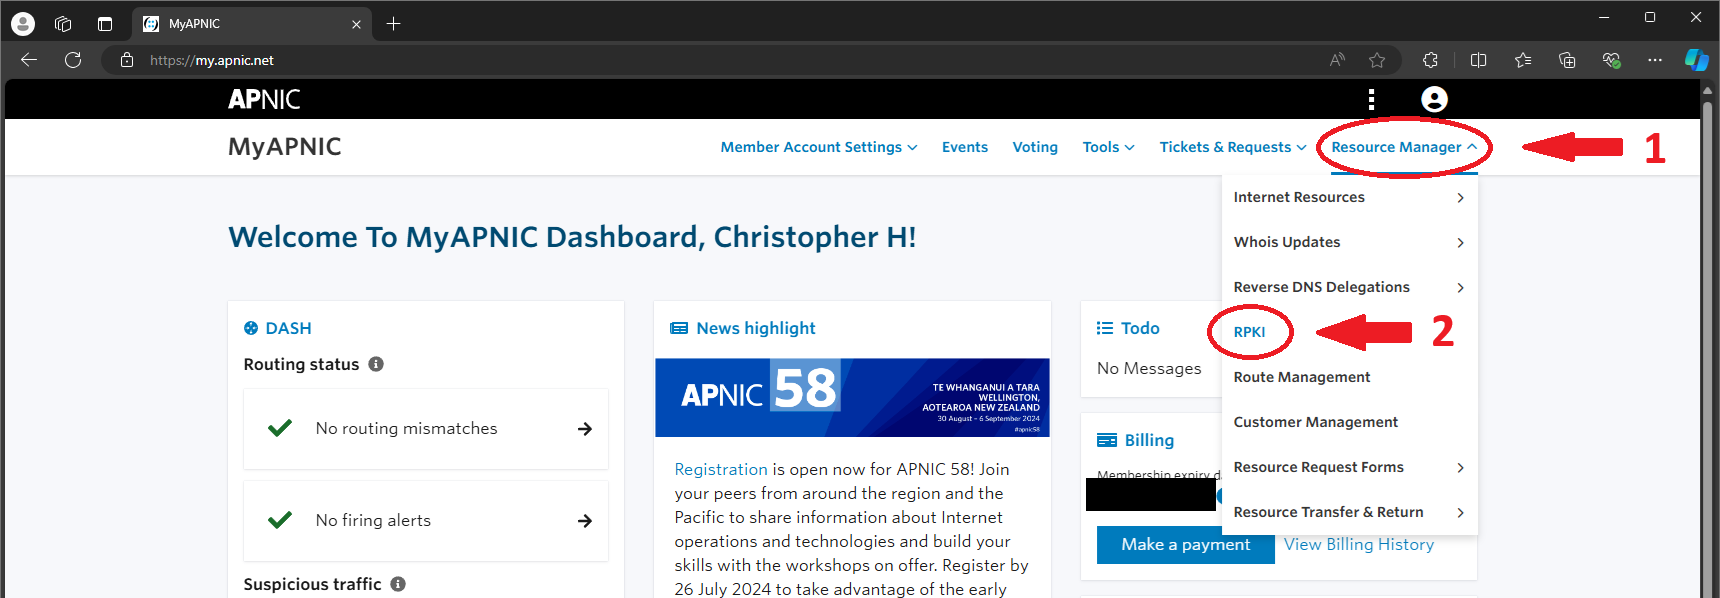
📷 Figure: MyAPNIC Home Page
A new page will load, titled "Enable Resource Certification". Select the option "I want to operate in the MyAPNIC RPKI Portal", click Next then follow the prompts.
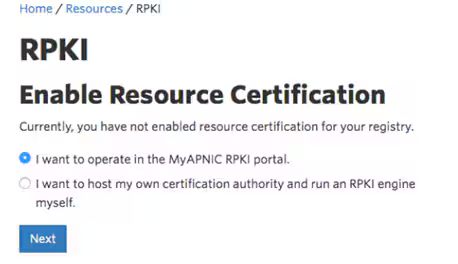
📷 Figure: Enable RPKI Resource Certification (Source: https://help.apnic.net/s/article/roa-objects, retrieved 28/07/2024)
Step 2 - Creating your first ROA!
Now that we have activated the RPKI Engine within our MyAPNIC account, it's time to create our first ROA. Click again on Resource Manager in the menu bar, followed by Route Management.
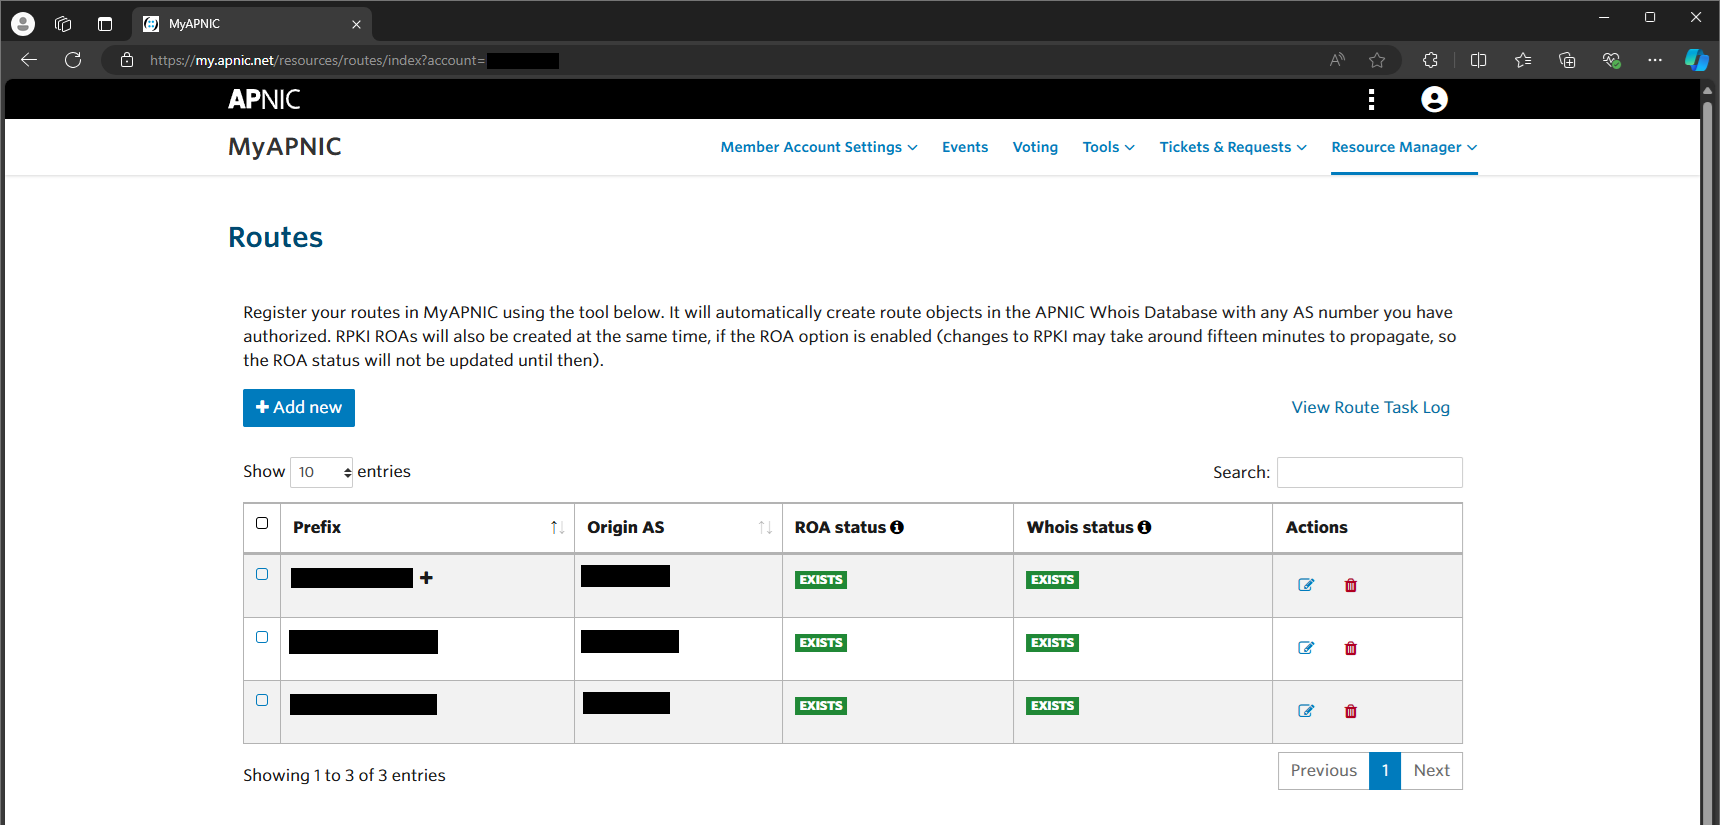
📷 Figure: MyAPNIC Route Management
Click on the blue "+ Add new" button, which will open a box to create your ROA. This process is relatively straightforward; there are five options required to create a new route object:
- Prefix: This is the prefix for which you are creating the route object. In this field, you want to enter your supernet (for IPv4 space this would be as an example 10.0.0.0/22).
- Origin AS: This is the AS from which the route will originate (e.g. AS65536).
- Max Length: In this field, you will enter the maximum length of the prefix that the AS is authorised to advertise, for example /23.
- ROA: Tick this box to create the ROAs for the route you are creating.
- Whois: Tick this box to create the Whois route objects.
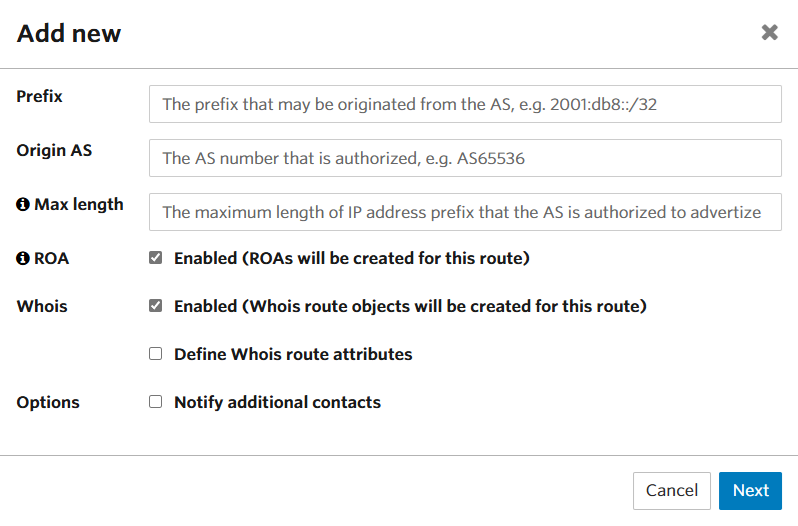
📷 Figure: Adding a new route in Route Management.
Complete the above 5 options, then click on next. The next window to appear will ask you to confirm the route creation. If the Max Length is different to your supernet size, it will give you the option to select subnets to be enabled. If this is the case, select the subnets to be enabled and click on Submit. If your supernet size and Max Length match, it will not give you this option and you can simply click on Submit.
APNIC have implemented a queuing system where changes will not take immediate effect after they have been submitted; rather it will go into a queue. At the top of the table of routes, click on the Pending button. This will then show you your pending changes table. If everything is correct, click on the blue Commit button. It will then process the queue and either confirm that the changes have been committed successfully, or advise that there was an error.
If you are creating a ROA for an existing route object, the process is fairly similar. All you need to do is click on the Edit button (denoted by the little square with pencil), tick the ROA Enabled box, click on Submit then commit the pending change queue.
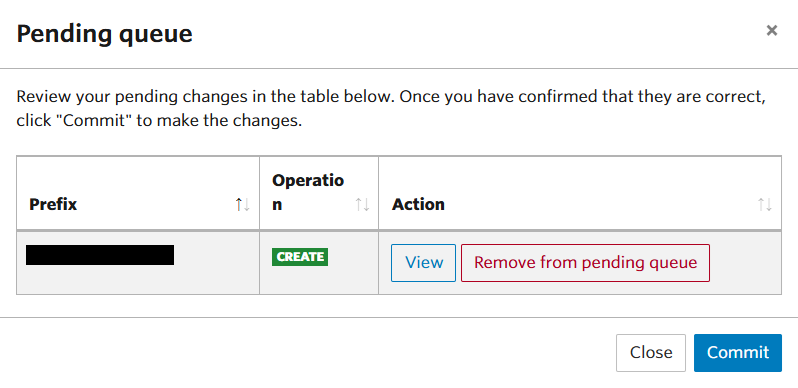
📷 Figure: Pending Changes queue in Route Management.
Step 3 - Confirming your ROAs have been created
There are a number of ways in which you can check to confirm if your ROA has been successfully created. Typically this is done in near-realtime, however, it can take anywhere from 15 minutes to 4 hours to propagate.
To check your ROA has been created, you can use Relying Party (RP) software (which will be covered in more detail in another section of this site) to verify your routes have been created and propagated.
Go to the web URL for preferred route validator. For the purpose of this guide, I will be using the Routinator instance operated by NLnet Labs. On the main page, there will be a field labelled "Prefix or IP Address". In this field, enter the prefix for which you created the route object with ROA earlier (and the Origin AS if it is not currently being advertised) then click on Validate. This will confirm that your route has a valid ROA, or either advise that it is an invalid ROA or does not exist.
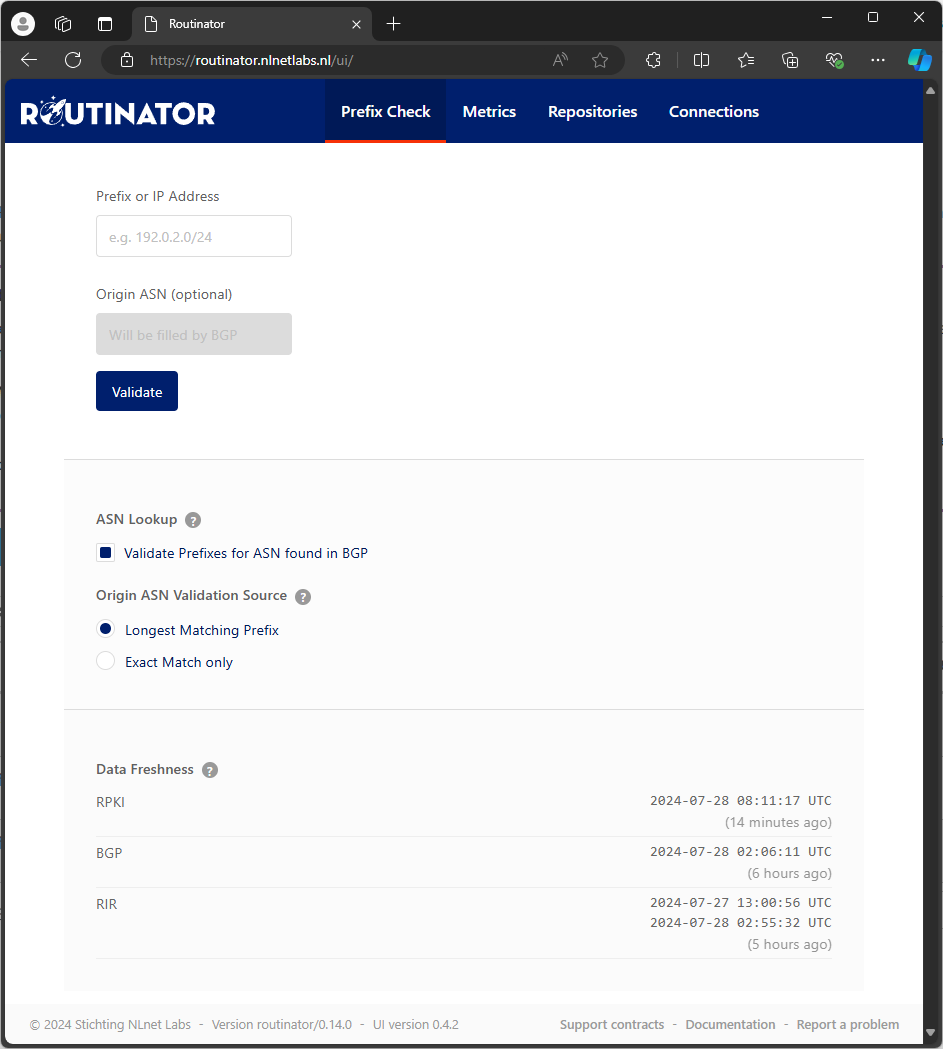
📷 Figure: NLnet Labs' Routinator UI.
It is technically possible for multiple ROAs to exist, so it is worthwhile confirming that the ROA found is the one you just created. Another way to confirm this is by using the following commands (substituting the prefix for your own). The first command gets the information from the JSON file, and the second converts it from a POSIX timestamp into a human-readable UTC timestamp. The value you want to check is the signing_time.
curl --compressed -s https://console.rpki-client.org/dump.json | grepcidr3 -D 2001:67c:208c::/48 | jq 'select(.type == "roa")'
date -r 1708017766
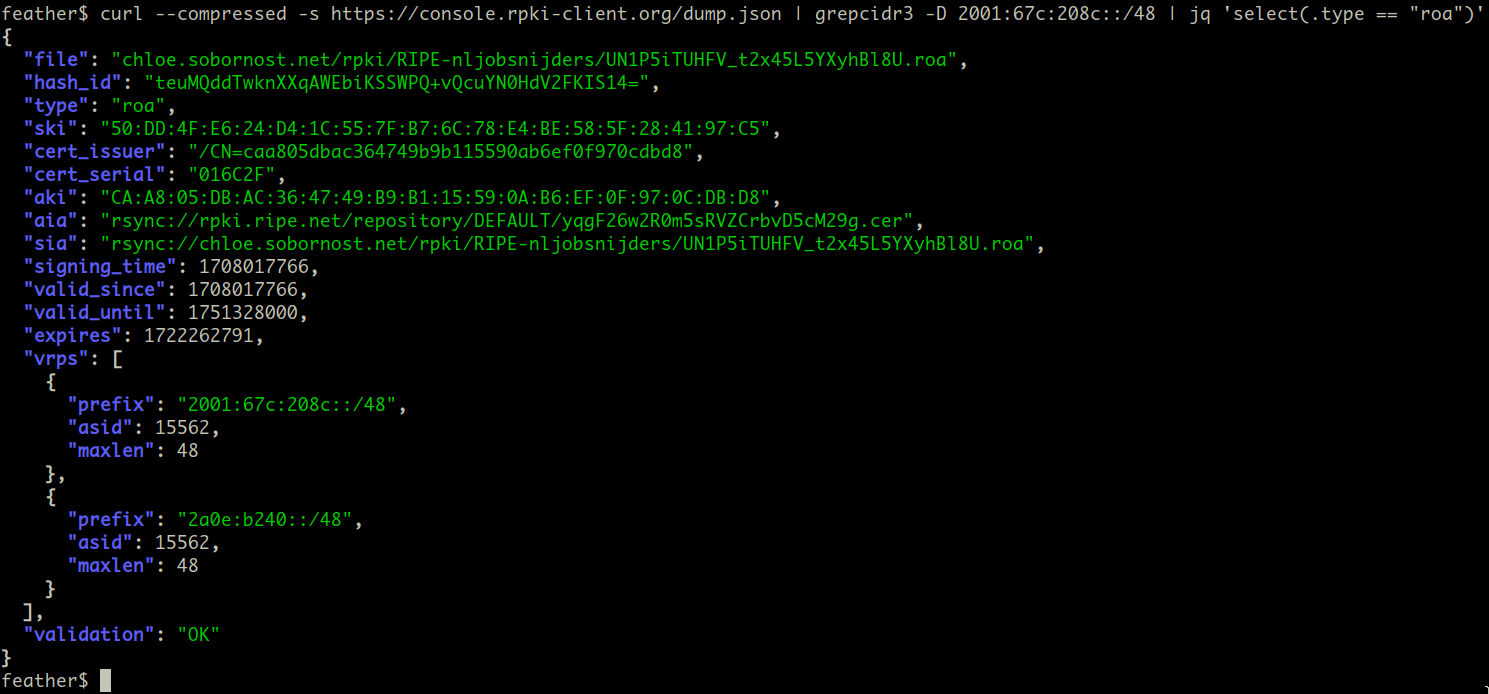
📷 Figure: Output of the JSON dump from the RPKI Client Console on OpenBSD (Source: Job Snijders, received 29/07/2024)
The commands for Debian-based systems are fairly similar:
curl --compressed -s https://console.rpki-client.org/dump.json | grepcidr 2001:67c:208c::/48 | jq 'select(.type == "roa")'
date --date='@1722155029'
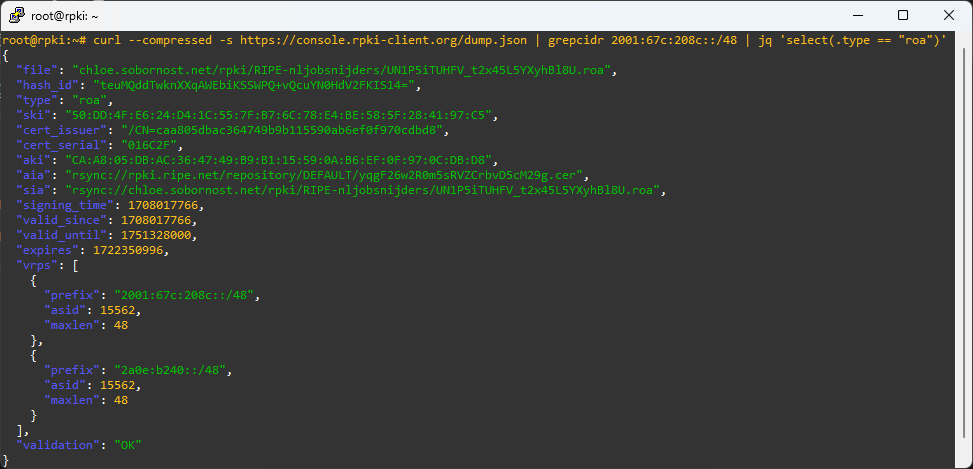
📷 Figure: Output of the JSON dump from the RPKI Client Console on Ubuntu
Conclusion
You have successfully created your first ROA, and taken an important step towards securing your internet number resources. This process will ensure that any network operators who have implemented ROV across their network will either reject your route if it is advertised from an AS that is not authorised, or give it a lower preference, at their discretion.