MikroTik Configuration
MikroTik's RouterOS v7 supports the RPKI to Router Protocol (RTR) as defined in RFC8210. To enable route object validation, fortunately the process is rather straightforward (depending on how complex your route filters are).
Before you can configure your router, it requires that you have either installed your preferred validator software onto a server, or have access to one.
Step 1 - Connecting to your Validator
Connect to your router using SSH or Telnet and execute the below commands:
/routing/bgp/rpki
add group=rtrGroup1 address=192.0.2.110 port=8282 refresh-interval=30
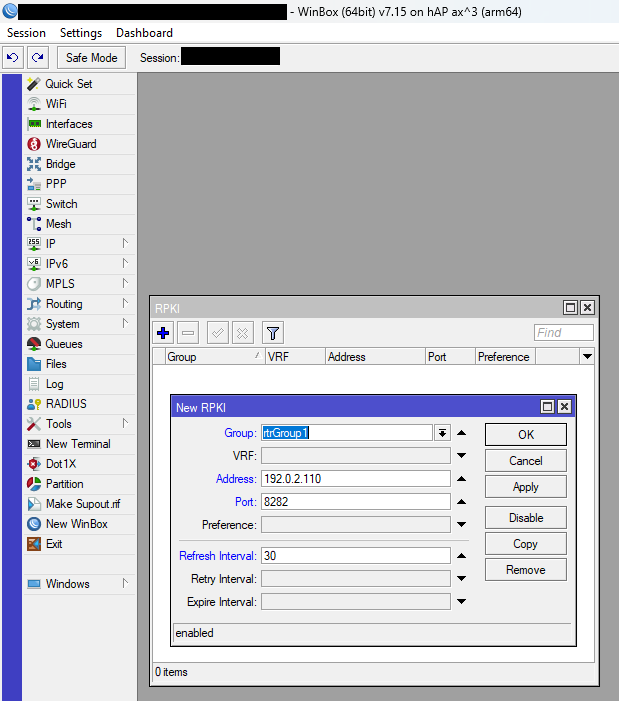
Otherwise if you prefer to use WinBox for router management connect to your router, and in the menu on the left go to Routing > RPKI. When the RPKI window opens, click on the blue + button. Enter the group name, address, port number and refresh interval.

📷 Figure: New RPKI validator configuration window.
To confirm that your validator is configured correctly you can issue the following command:
/routing/rpki/rpki-check group=rtrGroup1 prefix=103.0.0.0/16 origin-as=4608
Step 2 - Configuring BGP route validation
To configure route validation, you will need to do so in your route filters. This is by far easier to do so on the command line, either via SSH/Telnet or the Terminal window in WinBox.
/routing/filter/rule
add chain=bgp_in rule="rpki-verify rtrGroup1"
add chain=bgp_in rule="if (rpki invalid) { reject } else { accept }"
You can take a look at MikroTik's Route Selection and Filters page for additional functionality regarding route filtering.